We had so much fun decorating Baby M's nursery. The project was a collaboration between my husband and myself. Our goal was to create a warm, welcoming space with a lot of color that would also transition from a baby's room to a toddler or child's room easily.
Showing posts with label Home Decorating. Show all posts
Saturday, April 12, 2014
Tuesday, May 1, 2012
Chandelier Before & After
Cheap, easy and pretty. That about sums up this DIY chandelier makeover. When searching for a new light fixture for one of our guest rooms, I decided I wanted a chandelier. The room, when finished, will have a whimsical, airy, vintage look and feel.
Not only did I want a chandelier, but I wanted one that had whimsy and color. During one of our afternoon Home Depot runs, we spotted a rack of clearance lighting. Behold, the Williamsburg 6-Light Chandelier. List price = $99.97. Clearance price = $10.
Add a can of Rustoleum spray paint in a vintage green hue; a ceiling medallion; and some chandelier crystals ordered at Cristalier.com and you have a simple chandelier makeover.
First, I wiped down the chandelier with a clean cloth. Next, I covered the white parts of the lights (the bases) with tin foil to prevent paint getting all over them. We hung the chandelier outside and gave it several coats of Rustoleum (look for formulas recommended for painting metal). I ordered crystals from Cristalier and hung them on various parts of the light fixture. Finally, we purchased a ceiling medallion from Home Depot in order to cover up a "funky" spot on the ceiling left from the old ceiling fan light fixture that had been there before.
And there you have it--a super-easy, cheap chandelier makeover. I can't wait to share more of this guest room as it comes together. I plan to paint the walls, paint the dressers and hang artwork next. I'll post all updates right here.
If you have any questions about my DIY process, feel free to comment on this post.
Tuesday, June 28, 2011
Accent Chair: Before and After
This accent chair was passed down to me from my mother. And please note that the "before" photo below shows the chair after we stripped the fabric from it. If I'm remembering correct, it had a victorian-esque print.

When we got married and I re-decorated our town-home master bedroom, it seemed like the perfect time to give my beloved old chair an update.
My husband removed its fabric, saving the old fabric as a guide for the amount (and size) of new upholstery fabric we'd need. He then sanded and re-stained the arms and legs to match our current furniture set.
Next, it was all upholstery tack and staple gun magic...adding the fresh, new fabric. I couldn't have been happier with how it turned out and I'm happy to report it still looks as good as it did the day we finished the project.


These photos were taken in our town-home, before moving.
When we got married and I re-decorated our town-home master bedroom, it seemed like the perfect time to give my beloved old chair an update.
My husband removed its fabric, saving the old fabric as a guide for the amount (and size) of new upholstery fabric we'd need. He then sanded and re-stained the arms and legs to match our current furniture set.
Next, it was all upholstery tack and staple gun magic...adding the fresh, new fabric. I couldn't have been happier with how it turned out and I'm happy to report it still looks as good as it did the day we finished the project.
These photos were taken in our town-home, before moving.
Monday, May 2, 2011
Spring decor
I nearly forgot to share some photos of how I decorated for spring and Easter this year. Keeping it pretty simple, I added some flowers and small spring accents.

Dining room table. - White flowers in lead crystal vase from Herberger's. - Mexican glass votive holders are thrifted.

Main floor living room side table. - Glassware, vintage. - Blue marble eggs, from local discount store - Green bird votive, Michael's.

Entryway table. - Green and blue glassware, both vintage - Ceramic robin's eggs, local discount store - White wax candle holder, Garden Ridge. - Statue, tag sale.
Dining room table. - White flowers in lead crystal vase from Herberger's. - Mexican glass votive holders are thrifted.
Main floor living room side table. - Glassware, vintage. - Blue marble eggs, from local discount store - Green bird votive, Michael's.
Entryway table. - Green and blue glassware, both vintage - Ceramic robin's eggs, local discount store - White wax candle holder, Garden Ridge. - Statue, tag sale.
Saturday, February 12, 2011
I'm elated to be able to share before and after photos of our main-floor guest bathroom. When purchasing our home, we were blessed with the fact that there really wasn't anything wrong with the home or any of its rooms. They just need a bit of sparkle.
This bathroom is my bathroom. We have a master, but it doesn't have a bathtub--just a shower. I'm a huge fan of the long, hot bath. This is also the biggest of our bathrooms and thus can hold more beauty products (not that I have an unnecessary amount or anything--wink).
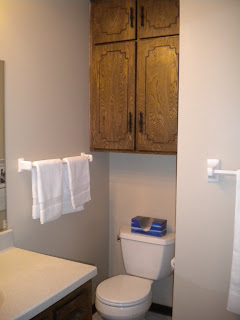
Bathroom before. (Taken during walk-through before home was purchased)
- Added a new mirror with beveled edges
- Painted (striped) the walls
- Added a new, ruffled shower curtain
- Replaced the old light fixture with a pendant fixture
- Added new towel bars and drawer pulls
- Painted the existing vanity and added trim
- Purchased new rugs and accessories
Basically, we gave the bathroom a face lift. There are, however, some way-down-the-road projects we'd love to do which include a jetted tub, new vanity and tile. We also plan to purchase a new solid-core door.
All-in-all, I am thrilled with how this makeover turned out. Now, if you'll excuse me, there's a long, hot bath waiting for me.
Subscribe to:
Posts (Atom)